A clean weld on a flat strip is a useful starting point in a factory assessment. The harder question is whether the same supplier can close a three-dimensional bag, join a thick corner, attach a handle and reproduce those details throughout an order. Those operations determine how much confidence a buyer can place in an approved sample.
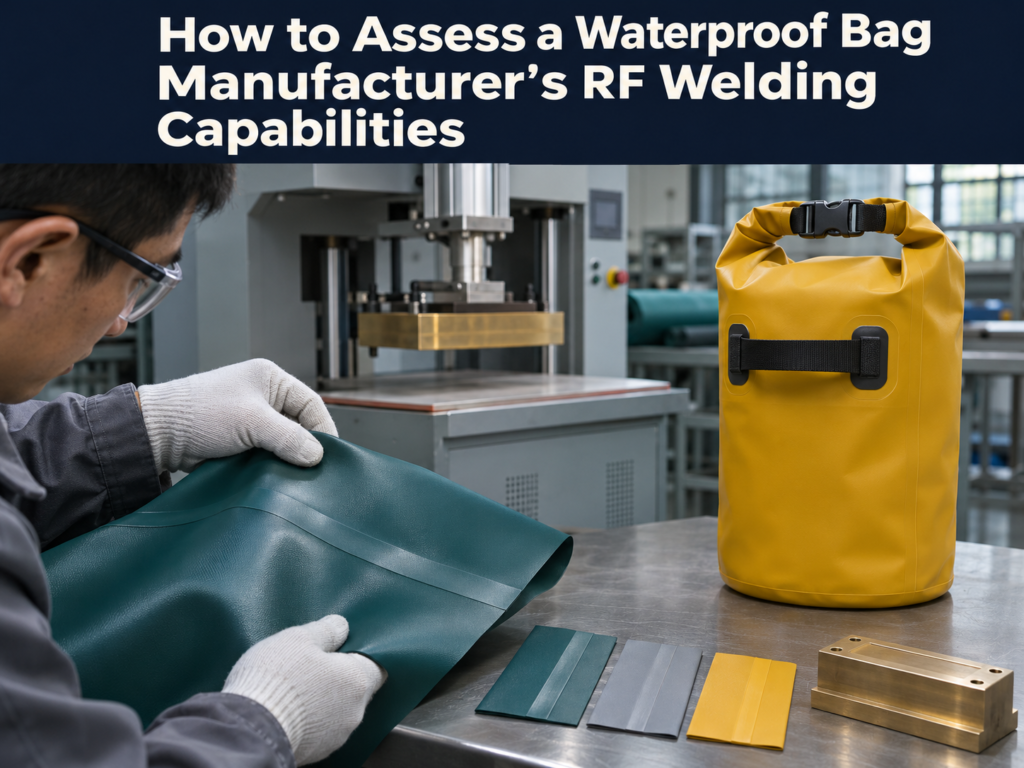
For a custom waterproof bag, assess the proposed material, joint design and production method together. Ask the technical team to demonstrate the difficult features in your product, identify how they will inspect them and show how the approved construction will be transferred to bulk production. The evidence should connect a specific sample to the equipment, tooling, material and settings used to make it.
This guide describes a practical assessment for brands, sourcing teams and product developers. It includes questions for a factory visit, a framework for sample trials and an illustrative pilot run that helps expose variation before an order is released.
Define what the bag needs to keep dry
Start with the intended exposure and contents. A cycle bag used in rain, a roll-top duffel placed on a wet boat deck and a pouch expected to withstand immersion have different requirements. State the exposure the finished product must handle, including its orientation, closure condition, load and any duration or depth relevant to the claim.
Write the requirement in terms the manufacturer and test team can reproduce. For a roll closure, specify how it is closed and the maximum fill condition. For a zipper opening, identify whether the requirement applies with the zipper fully engaged and the end secured in a particular position. A result obtained on a lightly filled bag can leave questions about a full bag that pulls on the closure.
Mark the protected compartment on the drawing. Show which seams, hardware and attachment areas form part of that barrier. An exterior pocket may be allowed to get wet while the main compartment must remain dry. Making that boundary clear helps the factory decide where welding is required and where sewing or another attachment method can be used.
Agree what counts as water entry and how it will be detected. Absorbent indicators, visual examination or a measured change can support an agreed method. Define how water on the outside will be managed before opening the bag so it does not contaminate the inspection. The test needs to distinguish leakage during exposure from water introduced while handling the sample afterward.
Understand the RF process well enough to evaluate a demonstration
Radio frequency welding, also called high frequency welding, uses an electromagnetic field to generate heat in compatible thermoplastics while the joint is held under pressure. The softened surfaces fuse, then the joint is allowed to cool under controlled pressure before release. Many industrial systems operate at 27.12 MHz.
PVC and suitable thermoplastic polyurethane materials are common candidates. Weldability depends on the formulation and construction of the actual film, coating or laminate. The textile substrate may provide reinforcement while the thermoplastic surfaces form the welded interface. A generic description such as “TPU fabric” leaves open questions about coating thickness, surface treatment and which faces can be joined.
During an assessment, ask the factory to explain the operation it will use for each joint. RF, hot-air, hot-wedge and other thermal processes have different requirements. A product may use more than one process. Record the proposed method on the construction drawing so the trial and production reviews address the same arrangement.
Have the operator demonstrate the full cycle from loading the panels to unloading the finished joint. Watch how the overlap is positioned, how the surrounding material is supported and how the operator confirms the cycle is complete. Ask what happens when the machine gives an alarm or the material slips. That discussion reveals whether the team has a repeatable method for dealing with an interrupted weld.
Buyers should observe from the factory’s designated visitor position. Adjustments and operation belong with trained personnel following the equipment procedures. The assessment can examine controls, records and finished samples without interfering with machine guarding or the operating cycle.
Match the material trial to the purchase specification
Request the material manufacturer’s article reference and the construction of the supplied fabric. Identify the substrate, coating or film, finished thickness or weight and the joining faces. Ask whether printing, a surface finish or adhesive is present in the planned overlap. Those details help the factory decide what needs a trial.
Confirm the exact material used for development. A sample room may have a similar roll available before the production material arrives. That can help resolve panel geometry, but the factory needs to identify the substitution and repeat the relevant joining checks with the intended material. Keep the trial record linked to the article and lot.
| Material detail | Evidence to request | Why it matters to the assessment |
|---|---|---|
| Article and lot | Supplier reference, roll identification and purchase description | Links the result to the material actually tested |
| Layer construction | Substrate, film or coating arrangement and joining faces | Defines the surfaces that must fuse |
| Thickness or finished weight | Specification and relevant incoming measurements | Helps identify variation that may affect the setup |
| Surface condition | Printing, finish, contamination controls and handling method | Shows what will be present at the joint |
| Material change | Written substitution review and affected tests | Keeps later supply aligned with the approved construction |
Begin with controlled trial pieces, then include the combinations used in the product. A two-layer side seam, a reinforcement patch and a folded base corner can have different thicknesses and support requirements. Make a separate trial for each meaningful stack rather than assuming one setting will cover the whole bag.
Ask how the factory verifies the material when a new roll arrives. It may compare the article and colour, inspect the surface and run a first-off weld. Confirm what happens when thickness or joining behaviour differs from the approved reference. The purchasing description and incoming checks should make it possible to hold a questionable roll before it becomes cut panels.
Ask the factory to build its most difficult joint
Select a detail that represents the challenge in your design. A bottom corner with several layers, a zipper end or the final closing seam can reveal more than an accessible straight seam. Give the factory the drawing and ask it to explain how the assembly will be positioned at that stage.
The final seam deserves particular attention. As panels are joined, the bag becomes harder to place over a support or under an electrode. Ask where the partly assembled body goes, how loose layers are kept out of the weld and how the operator reaches the full joint. A method that works on an open panel may need a different fixture once the body is closed.
Review the attachment design. A handle can be sewn to a separate patch before the patch is welded to the body, provided the construction is qualified for its intended load and water barrier. Other designs may use welded attachment components. Ask the team to identify the route through which the carry load enters the bag and where any needle holes sit relative to the protected compartment.
Inspect the inside and outside of a demonstration piece. Look for wrinkles entering the seam, uneven overlap, sharp transitions and areas where layers are pulled away from the tool. Ask the operator to point out the reference marks or fixture features used to position the next piece. If alignment depends on judgement, ask how the permissible variation is defined and checked.
A relevant demonstration can use a simplified body that preserves the difficult geometry. This can reduce development cost while answering the manufacturing question. Document which details are representative and which still need confirmation on the complete bag.
Review tooling and settings as one setup
The electrode defines the weld path, while the support and fixture help establish contact and alignment. Ask to see the drawing or identification for the tool proposed for your product. Check that the finished weld can be measured against a defined width and position on the bag.
Examine how corners, seam starts and seam ends are formed. Where a long seam requires more than one press cycle, ask how the strokes overlap and how the overlap area is verified. A continuous line on the drawing may be made in several operations, so the handoff between those operations belongs in the trial.
A tool that leaves a sharp step or a locally thin edge can create a weakness beside the joint. Ask the technical team to explain the visible impression and any displaced material. The factory should inspect both the fused zone and the adjacent fabric, particularly at heavily compressed corners.
The setup record needs the variables the factory actually controls. These can include the machine and tool references, pressure, RF power or the applicable output indication, weld time, cooling or hold time and any relevant tool-temperature control. Record the material stack and supporting arrangement alongside them. A number copied from another machine can have a different meaning, so require a setup confirmation when equipment changes.
Ask how a recipe is selected, who can alter it and how changes are recorded. A paper setup sheet can work when it is controlled and followed. A stored electronic recipe can work when it is tied to the right tool and revision. In either case, the operator needs to know the approved values and when a deviation requires review.
The factory should also be able to explain what establishes its working range. A trial programme can evaluate suitable variations in settings and assess the resulting joints. The goal is a process that remains acceptable within defined conditions. An apparently strong sample made at one undocumented setting gives the team little information about the next run.
Test the failure modes that matter for the product
Evaluate strength and leakage separately, then examine how they interact after use. A seam may resist a pull yet contain a channel that admits water. A bag may pass an initial water check and later develop damage around a loaded attachment. The trial plan should cover those different mechanisms.
For a mechanical test, identify specimen geometry, loading direction, width, conditioning and the measurement used to judge the result. Peel and shear arrangements place different demands on a joint. Ask the laboratory or technical team to select the method for the question being investigated and state any departure from a published procedure.
ASTM D751 includes procedures addressing coated-fabric properties such as seam strength, coating adhesion and hydrostatic resistance. ISO 2411 addresses coating adhesion. Select the applicable procedure and edition with the test provider, then define the product’s acceptance criteria separately. See ASTM D751 and ISO 2411.
Record where a tested piece fails. Separation at the welded interface, coating separation from the textile and tearing in the surrounding material suggest different limits in the construction. A torn substrate can show that the joint carried the applied load, but the measured load still needs to satisfy the intended requirement. Keep photographs of the failed specimen with its force result and material reference.
For leakage, test both representative seams and the finished bag. A fabric hydrostatic result describes the tested fabric and method. The assembled bag adds corners, openings and attachment details. Where fabric penetration resistance is relevant, ISO 811 provides a hydrostatic pressure method. Pair the material result with an agreed finished-product exposure.
Treat leak-test results as measurements with conditions
Ask the factory to describe its leak-check method before watching a demonstration. Record how the sample is closed, what pressure or water exposure is applied, how long it is observed and which features are included. If a test uses an adapter in place of the finished closure, identify the part of the product that remains untested.
For a pressure-decay method, ask how stabilization, temperature and the flexibility of the bag are accounted for. A soft body can change shape after pressurization, affecting a reading. The fixture and procedure need to distinguish those effects from leakage. Equipment should be suitable for the product and used by trained personnel within a validated safe method.
For a bubble test, identify the locations observed and the criteria for a leak. Document any masking, clamping or temporary sealing used to connect the test equipment. Test pressure should be selected for the construction and assessment; an improvised high-pressure demonstration can damage the sample and provide misleading evidence about normal use.
For a water-exposure test, verify the complete closure and check the sample at the specified fill. Record where moisture appears. Water at a zipper end leads to a different investigation from water along a side seam or beneath an attachment patch. Keep the failure location on a drawing so the next trial can demonstrate whether the correction resolved that particular route.
Where flexing, folding or load cycling reflects the product’s intended use, compare leakage and mechanical performance before and after the agreed conditioning. Define the sequence so it can be repeated. A set of tests is more informative when every specimen has an identity and the record shows what happened to it before the final observation.
Use a pilot run to expose variation
A pilot run connects the development sample to the proposed production method. Ask for a limited set of bodies or subassemblies made with the intended materials, tooling and work instructions. Include enough consecutive work to observe loading, handling and the effects of repeated operation. The scope should reflect the risk and complexity of the product.
Here is an illustrative exercise for a new roll-top duffel. The buyer and manufacturer agree to make twelve pilot bodies using the production material and proposed tooling. This quantity demonstrates how to organize an assessment. The actual qualification sample size and acceptance rules should be set for the project.
| Pilot units | Planned activity | Question the activity addresses |
|---|---|---|
| Bodies 1–4 | Make an initial consecutive series and record the setup | Can the first setup produce consistent alignment and appearance? |
| Bodies 5–8 | Continue production using the same instructions | Does the joint remain consistent as work continues? |
| Bodies 9–12 | Repeat the setup after a planned stop and restart | Can the documented method recover the approved result? |
| All twelve bodies | Perform the agreed dimensional, visual and leakage checks | Which defects or variations occur across the series? |
| Identified companion specimens | Carry out the agreed destructive tests for each run segment | Do the mechanical results support the proposed joint and process? |
Label each body and any companion test piece before the run. Record material lot, machine, tool, operator and settings. If a companion specimen is welded separately from the body, describe that distinction. It can help monitor a setup, while the product still needs evaluation at its actual corners and intersections.
Suppose eleven bodies pass the agreed leakage check and one shows moisture at the base corner. Keep the failed unit and identify when it was made. Compare its overlap, layer positioning and tool impression with the neighbouring units. If the cause is a wrinkle entering the weld, assess whether the fixture and instruction reliably prevent that wrinkle. Retain the failed body so the cause can be investigated alongside the passing pieces.
After a correction, repeat the affected operation and the checks needed to demonstrate its effectiveness. Keep the original result in the record. The assessment should show what changed and why the revised method is acceptable. If a restart or different operator is likely in normal production, include that condition in the confirmation.
For a remote review, request a continuous view of selected units from identified material through welding and marking. Ask for the resulting specimens and reports to carry matching references. An independent visit or laboratory check can add confidence when the order’s value or technical requirement justifies it.
Examine the production controls behind the sample
Follow one hypothetical bag through the factory’s records. Start with a material roll, then identify the cut batch, welding operation and finished lot. Ask how the factory would find affected goods if an incoming roll or weld check later failed. The traceability detail can be proportionate to the order, but the team needs a workable way to define what is held.
Check the inspection points around operations that hide the joint. A reinforcement may cover a weld edge, or a lining may make later examination difficult. Ask whether the joint is checked before the next assembly step. Corrections are easier to control when the factory can still see and access the affected area.
Review the response to an out-of-range setting or an interrupted cycle. The operator should have a defined way to identify the piece, stop its movement and call for review. Ask what happens to units made since the last acceptable check and how the factory decides whether they need sorting or additional testing. This connects process monitoring to actual shipment control.
Tool condition also needs attention. Ask how electrode faces, supports and fixtures are inspected and maintained. Look at how the factory handles a worn guide, an uneven impression or a damaged tool surface. A repair can change contact or alignment, so the factory should have a method for confirming the setup before work resumes.
Check how production is transferred between machines or shifts. The available machine may change because of maintenance or scheduling. Require the factory to confirm that the tool, recipe and supporting arrangement are appropriate on the receiving equipment, then verify the first pieces under the agreed checks. Include that transfer in the production plan when it is already expected.
Read test reports with the sample beside you
Match the report’s item description to the physical sample and drawing revision. Look for the material reference, specimen location, method, conditioning, units and results. Ask for clarification if the report lists only a pass statement without enough information to identify what was tested.
Be careful with force comparisons. A result reported for a strip of one width cannot be compared directly with a result for a different width unless the method and interpretation support the comparison. A normalized value also needs its original specimen information. Ask the technical team to explain the acceptance basis, especially when a supplier proposes a result from another product as evidence.
A fabric report, a welded-strip report and a completed-bag report answer different questions. Map each one to the requirement it supports. A supplier can use previous results to explain its experience, then generate project-specific evidence where the new material, geometry or closure changes the conditions.
Keep an approved reference package with the final sample. Include the construction drawing, bill of materials, tooling identification, controlled setup instructions, test results and agreed visual references. Record any accepted deviation. The production and inspection teams should be able to identify the same approved joint without relying on the person who attended the development meeting.
Make the factory visit answer specific questions
Give the supplier an agenda based on your bag before the visit. Ask for the technical person responsible for the process and the person who manages inspection to attend the relevant sections. Bring the latest drawing and select the joints you want demonstrated. This lets the team prepare representative material and tools.
| Assessment topic | Question to resolve | Evidence to retain |
|---|---|---|
| Product scope | Which compartment and exposure does the factory propose to qualify? | Marked drawing and acceptance requirements |
| Material and tooling | Can the actual stack be positioned and welded through the full assembly? | Material references, tool identification and demonstration pieces |
| Process control | How are approved settings selected, checked and restored? | Setup record and restart confirmation |
| Test interpretation | What fails, where does it fail and under which conditions? | Identified specimens, measurements and failure photographs |
| Batch control | How are questionable units held and released? | Traceability example and corrective-action record |
| Delivery capability | Can the required good units be produced and checked in time? | Production sequence, capacity assumptions and inspection allocation |
Ask about outsourcing directly. A manufacturer may subcontract a specialist operation while retaining assembly and quality responsibilities. Identify the facility performing the RF work, how its instructions are controlled and how the manufacturer verifies returned parts. If a different site will weld bulk goods, include that site in the qualification scope.
Assess capacity with the quality work included. Cycle time alone leaves out loading, positioning, inspection, tool changes and rejected pieces. Ask the factory to estimate good output for the proposed construction and show where the inspection steps fit. A technically qualified seam still needs a feasible production schedule for the ordered assortment.
Close the visit with a short list of resolved items and open actions. Each open item needs an owner and evidence required for closure. For example, the next step might be a revised corner fixture followed by an identified pilot series. Keep the action tied to the drawing revision so the buyer can make a release decision from the completed evidence.
Allow development time for the actual weld geometry
Separate the cost and timing of material trials, tooling and assembled samples in the development quotation. A straight trial can establish a starting setup, while a new base-corner electrode or support may need design and fabrication. Ask which tools can be reused and which belong specifically to your bag. Agree how revisions will be identified if a trial leads to a changed weld path.
The first sample date should state which material and tooling will be used. If the production laminate is still being sourced, schedule a confirmation trial after it arrives. If the finished closure is unavailable, identify the open test requirement and its expected completion date. This gives purchasing a realistic view of what the sample can support.
Keep destructive testing in the sample quantity. A body cut apart to examine a corner cannot also serve as the untouched reference for a later water test. Assign the planned use of each sample before fabrication and retain enough identified pieces to investigate a failure. The factory and buyer can then agree on the additional work when a revision is needed.
Before paying for bulk material or releasing the order, compare the remaining technical actions with the delivery plan. A pending closure test, a fixture correction or a material substitution can change the time needed to qualify the product. Record those dependencies with the sample programme so approval follows the completed evidence.
Set clear conditions for order approval
Base the decision on the specific product and its demonstrated method. Some items can be approved while a separate feature remains under development. State exactly which material purchases or tooling work are authorized and which manufacturing operations still depend on further evidence.
When comparing suppliers, use the same construction and exposure requirements. One offer may include only the welded shell while another includes the closure, attachment assemblies and finished-bag tests. Reconcile those differences before comparing price or delivery. The approved quotation should include the verification work the order actually needs.
Keep change control practical. A new material lot may call for routine incoming and first-off checks. A different laminate, revised electrode or new closure may require a broader requalification. Ask the technical team to define the affected checks and record the decision before the change enters production.
Discuss your waterproof bag project with Raketbag
Raketbag provides OEM and ODM sports bag development, including material selection, sampling, branding, packaging and production support. For a waterproof bag enquiry, share the intended exposure, protected compartment, material preferences, capacity, load and closure requirements. Add drawings of the corners and attachment areas, plus the quantity and required delivery date.
Ask the project team to confirm the proposed joining method, production location and evidence needed for your construction. Use the sample programme to resolve the difficult details, then carry the approved materials, tooling references and inspection requirements into the production order.