A custom belt bag is a small product with very little room for a bad decision. Move a strap anchor by a few centimetres and the bag may tilt away from the body. Add a lining pocket and a phone that fitted the first sample may catch on the zipper. Order a custom buckle and a run that looked economical at the quoted quantity may leave you paying for hardware you cannot use until the next season.
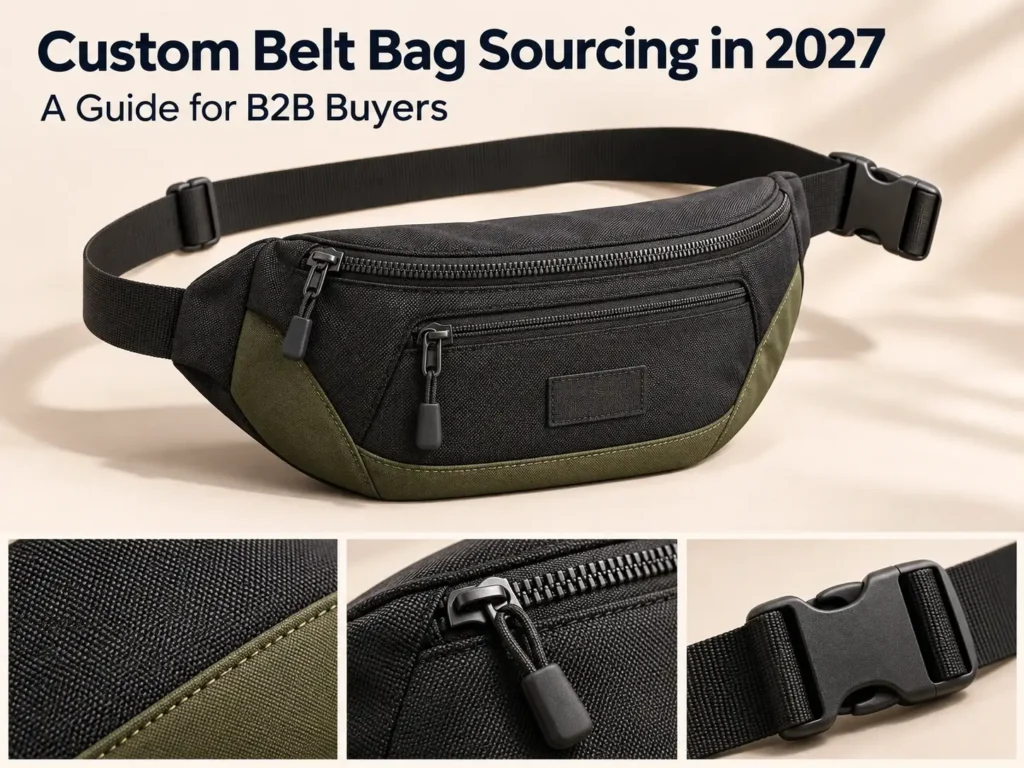
For a 2027 launch, make three decisions before asking a supplier to quote. Define how the bag will be worn and what it needs to carry. Decide which features genuinely need to be custom. Set the date the goods must reach the distribution centre, retail network or event site. Those details shape the material selection, order minimums, sampling schedule and total cost.
This guide follows an order from the first product brief through supplier selection, pre-production approval and shipment. The examples are for brands, retailers, distributors and promotional buyers. A team ordering a standard bag with a printed logo can use the same process with a shorter specification and fewer development stages.
Define the belt bag by how people will wear it
“Belt bag,” “waist pack” and “fanny pack” can all describe products with a similar shape. In a factory brief, the useful distinction is where the pouch sits, which way the strap pulls and how the user reaches the opening. Write down whether the bag will be worn at the waist, across the chest, over the back or in more than one position. Put the preferred position on the drawing. If the secondary position matters commercially, include it in the fit test.
A retail lifestyle bag might carry a phone, keys and a cardholder, with the pouch worn across the chest. A running club may need a flatter bag that stays close to the waist while the user moves. A festival organiser may want a straightforward shape with a clear front panel for sponsor artwork. A travel retailer might prioritise access to a passport and a rear pocket that sits against the body. Each product has a different reason to exist, even if the bags look interchangeable in an empty sample photo.
| Product brief | Design decision to make first | What to check with a loaded sample |
|---|---|---|
| Everyday retail belt bag | Whether waist or crossbody wear takes priority | The pouch sits where intended, the strap adjusts over typical clothing, and the phone comes out without catching |
| Running or training waist pack | How the bag will control movement at the waist | Bounce, strap creep and rubbing after a movement trial with the intended contents |
| Travel or commuter belt bag | Where the phone, keys and travel documents will sit | Pocket access, zipper reach and the fit of the actual items |
| Event or promotional belt bag | The decoration area and the fixed delivery date | Print readability on the filled bag, consistent branding and carton quantities |
| Outdoor or wet-use belt bag | What level of water exposure the buyer wants the bag to handle | Moisture entry at the closure, seams and strap attachments under the agreed exposure |
Set the contents before setting the dimensions. A phone with a protective case may go inside the pouch but fail to pass through the opening without being angled. A key clip can keep keys accessible while placing them directly against a phone screen. A gusset may add volume at the bottom yet provide little space at the opening. Give the supplier the dimensions of the largest item and ask for the clear usable opening between the zipper stops.
For fit, ask the factory to measure the full closed loop at its shortest and longest usable settings. If the same strap is meant for both waist and crossbody wear, check those settings on people wearing typical garments for the target market. Pay attention to the position of the buckle and adjuster, especially if they land under an arm, at the spine or along a coat seam. A strap measurement on its own tells you very little about that experience.
Choose the right level of customization
A logo on an existing pattern can be the right choice for a one-off event or a short lead time. Ask for the current pattern, stock colours and hardware options, then choose a decoration method that works on the available panel. Check whether the supplier holds finished blank bags or plans to cut and sew them to order. That distinction affects where a logo can go and whether you can change the packaging or other components.
A semi-custom bag starts with a supplier’s existing design and changes selected parts. It may use an approved shell pattern with a longer strap, a different lining, a revised pocket or a new colour. This approach works well when the base product already fits the intended use. If a change affects the way the shell closes or carries weight, give it a separate sample check. Increasing pocket depth can alter the opening, and changing webbing thickness can affect whether an existing adjuster grips.
A fully custom OEM belt bag makes sense when the pattern, fit or layout is central to the product. The buyer supplies the design requirements, and the manufacturer develops the construction with the buyer. With an ODM route, the supplier may propose a design or adapt one it already develops. The labels vary by supplier, so ask each one to state exactly what its offer includes. Agree on who owns the new artwork and tooling, whether the pattern may be offered to other customers, and what can be reused for a repeat order. Include the agreed terms in the order documents.
Before adding a custom trim, identify the work it does. A custom-colour buckle can make a retail product look more considered, but it also creates a component that has to be matched, approved and reordered. A stock buckle with custom webbing may deliver the appearance the buyer wants with a different minimum and timeline. Ask the supplier to quote both constructions against the same bag specification if the decision is still open.
Build a tech pack a factory can quote
A good belt bag tech pack describes the finished article clearly enough for purchasing, pattern making, sewing and inspection teams to work from the same revision. It can begin with a front and back sketch, a top view with the zipper open and a side view showing depth and strap angle. Add a section through the pouch if the lining, foam or hidden pocket is hard to understand from the exterior views. Give every page a style number and revision date.
Measure the bag where the dimension matters. Call out the width across the face, the height at centre and the depth at a named point on the gusset. Indicate whether the dimensions are measured flat, empty, lightly filled or with the bag in another stated condition. A soft bag changes shape when it is laid flat. If you leave the measurement condition open, two inspectors can measure the same unit and reach different conclusions.
The strap drawing should show where the webbing enters the body, the angle of entry, buckle orientation, adjustment path and tail keeper. Include the finished minimum and maximum loop lengths and the measurement method. Identify any removable or reversible strap parts. A drawing of the complete strap path makes assembly errors easier to catch, particularly when both sides look alike at a glance.
| Specification area | What to put in the brief |
|---|---|
| Body and opening | Finished dimensions and tolerances, measurement points, zipper opening and intended contents |
| Strap assembly | Webbing width and material, minimum and maximum usable fit, routing, buckle location and anchor construction |
| Bill of materials | Shell, lining, backing or film, foam, webbing, buckle, adjuster, zipper, thread and labels |
| Branding | Artwork revision, finished size, colour reference, placement dimensions, orientation and decoration method |
| Functional checks | Fit, opening clearance, closure operation, strap hold, carry load and any moisture exposure requirement |
| Packaging | Unit presentation, tags, barcode placement, colour assortment, carton count and carton marking |
| Order information | Quantity by colour and SKU, sample requirements, delivery destination and required arrival date |
A target price can be shared as a design constraint. It helps the manufacturer propose a realistic starting point and gives you a basis for deciding which changes are worthwhile. State which elements are fixed and where an alternative is acceptable. A buyer might hold the strap fit and pocket dimensions fixed while allowing a change in lining or zipper pull. Ask the supplier to list all proposed substitutions in writing so the next sample and quotation can be reviewed against the same choices.
Select materials and hardware together
Shell and lining
Woven polyester is a practical starting point for a promotional or everyday bag. For a soft retail pouch, compare fabrics by finished weight, drape and appearance after sewing. For a more structured outdoor style, consider a denser weave or backing where the fabric needs to hold shape. Denier describes the linear density of the yarn. It leaves questions about weave density, finished weight, coating and abrasion performance open. Ask for the fabric article code, finished weight and backing when you compare offers.
Nylon or nylon ripstop is worth sampling when the brief calls for a lighter shell with a particular hand or tear performance. Compare actual swatches. Thin, soft shell fabric can show the outline of a phone or pull the front panel out of shape, while a stiffer backing may make the same bag awkward against the body. Wear the sample with its usual contents before signing off on the feel of the fabric.
Choose the lining for the inside of the bag. A light-coloured lining can make small items easier to see, and a smooth lining can make a tight pocket easier to use. If the bag will be worn close to the body in warm conditions, inspect any dark fabric or webbing that could transfer colour onto light clothing. If the product will make a recycled-content claim, define the exact component covered by the claim and verify what documentation will apply to the ordered material and finished product. A statement about the shell should be worded as a claim about the shell.
Webbing, buckles and adjusters
A buyer often handles an empty pouch first and notices the shell, then discovers the strap is what makes the bag comfortable or frustrating. Compare the webbing and hardware as a set. Webbing that feeds smoothly through an adjuster during assembly may slip after repeated movement. Stiff webbing can hold its position and still rub at the neck when worn crossbody. Use the production-intent webbing and adjuster together for the fit and movement check.
The buckle should close securely and release in the position where the user can reach it. Check it at the shortest and longest strap settings, with the pouch at the waist and across the chest if both positions are in scope. Place a reference mark on the webbing to show whether it creeps through the adjuster during the trial. If the finished bag includes an elastic keeper, try it with the longest excess tail likely to be left after adjustment.
Look at the attachment from the inside as well as the outside. The webbing may pass through the shell seam and into a backing patch or be sewn onto a reinforced panel. Under load, watch for a fold or line of tension where the strap enters. If the pouch tips forward, first check the angle of the attachment and where the contents sit. Adding a thicker webbing can leave the underlying geometry unchanged.
Zippers and moisture protection
A curved zipper can provide a wider opening, but tight curves and bulky seam stacks can increase the effort needed to move the slider. Try the zipper with the bag filled and held in the way a customer will actually use it. Check the ends of the opening for lining caught in the tape or fabric folded into the slider path. If the user is expected to open the bag one-handed, include that condition in the sample review.
Decide what any water-resistance claim applies to. A face finish can help shed droplets, a coating can improve the fabric’s resistance to water penetration, and a covered zipper can reduce direct exposure at the opening. The assembled bag still has seams, corners and closure ends that can admit water. For a rain-resistant retail bag, agree on a repeatable splash or spray check that reflects the intended use. For a design with a stronger claim, select a suitable construction and verify the claim on the completed product under defined conditions.
ISO 4920 describes a spray test for fabric surface wetting. ISO 811 measures a fabric’s resistance to water penetration under hydrostatic pressure. Use the fabric results to compare materials, then test the assembled bag at the exposure level described in the product brief.
Approve the logo on the bag customers will see
Screen printing, heat transfer, embroidery and sewn labels can all work on belt bags. The right choice depends on the artwork and where it sits. A flat front panel can take a print that would distort across a seam. Embroidery can add texture, but fine artwork may fill in and a dense design can pucker a lightweight shell. A sewn label changes the edge detail and may need to be installed before the front panel is assembled.
Give the supplier vector artwork where available, a colour reference and dimensions from stable points on the panel. For a logo centred beneath a zipper, specify the distance from the zipper seam and the left-to-right centre point. Ask for an approved strike-off or decoration sample on the actual fabric and colour. Then approve the logo on the assembled bag, filled to a representative shape. A logo that is centred on the cut panel can look too high after the gusset pulls the fabric around the face.
For retail orders, approve hangtags, unit barcodes, labels and any instructions at the same time. Check the printed barcode against the order’s SKU and colour mapping. For event orders with more than one sponsor design, approve the art for each version and show the packing team how the variants will be identified. A clearly marked carton assortment can prevent sorting problems even when the bags inside look almost identical.
Shortlist suppliers using evidence from comparable orders
Send the same brief to each candidate. Ask who will make the bag, which site will handle cutting and sewing, and which processes will be outsourced. Printing, embroidery, lamination and hardware production may be done by specialist suppliers. What matters is whether the proposed manufacturer knows which facility handles each process, how it checks incoming work and who is accountable if a component arrives late or fails approval.
Request evidence relevant to your construction. For a running waist pack, look for examples of a thin pouch with a stable strap assembly. For a rain-resistant bag, ask how the factory handles the zipper ends and how it checks seams for moisture entry. A video call can show sample room work, current production and the way components are identified. Use it to walk through a representative project or to see a specific operation. A portfolio of finished bags tells you less about whether a supplier can reproduce your design at the agreed tolerances.
Separate the documents by what they verify. A management-system certificate can describe the scope of a facility’s certified system. A social audit covers the facility and scope shown in the report. A lab report describes the material, component or finished sample identified in that report. Check the site, date, scope and item identifiers before relying on any of them for your order. If your retailer has a supplier manual, share its current requirements early enough for the factory to flag gaps and include the cost of meeting them.
Ask each finalist to comment on the brief before awarding the order. Useful replies are specific. A pattern maker might flag a tight zipper curve, ask for the loaded phone dimensions, or suggest changing the strap anchor to accommodate both wear positions. A merchandiser might point out that the quantity works across the style but is too low for a custom-colour buckle. These responses show how the supplier reads the brief and how early it raises problems that can affect the launch.
Compare quotes on the same basis
Request a written quotation tied to the tech pack revision. It should state the unit price and currency, the quantities it covers, the included materials and decoration, the packaging configuration and the trade term with a named place. Ask the supplier to itemise sample charges, tooling, artwork setup, testing and any packaging that is priced separately. Confirm which charges are payable again on a reorder and which depend on keeping the same materials or artwork.
Minimum order quantity can apply at more than one level. A factory might accept 1,200 bags per style while requiring 600 pieces per shell colour. A custom buckle might have a minimum of its own, and an artwork change might add a setup charge even if it uses the same bag. Ask what happens to excess purchased fabric or hardware, who pays for it and whether it can be reserved for a repeat order. Confirm how long any stock reservation applies.
Suppose a buyer wants 1,200 units across three colours, 400 units per colour. A factory minimum of 1,200 units per style looks compatible until the quote specifies 600 per colour. The buyer could reduce the range to two colours at 600 units each, select a stock fabric that the supplier can purchase in smaller quantities, or increase the total to 1,800 units. Each option changes a different part of the business case. Compare the inventory commitment and launch requirements before deciding.
A second example shows why the lowest quoted unit price can be misleading. Both hypothetical offers below cover 1,200 bags to the same specification and the same delivery point. The amounts are illustrative.
| Quote item | Offer A | Offer B |
|---|---|---|
| Quoted price per bag | USD 4.25 | USD 4.05 |
| Required retail packaging per bag | Included | USD 0.12 |
| One-time setup charged to this order | USD 120 | USD 300 |
| Order total before other landed costs | USD 5,220 | USD 5,304 |
| Effective price per bag | USD 4.35 | USD 4.42 |
For budgeting, build a landed-cost worksheet with the quoted goods, relevant transport and handling, inspection and testing, and applicable import charges. Use the current classification, origin and destination information confirmed for your shipment when estimating those charges. Compare trade terms at the same handover or delivery point. Put the named place and the applicable rules in the quotation and purchase order, then check who arranges carriage, insurance where needed and import clearance. The International Chamber of Commerce publishes the Incoterms rules.
Use sample rounds to close specific decisions
Treat sampling as a sequence of approvals. The development sample answers questions about the pattern and fit. A revised sample can confirm the strap path, pocket geometry and decoration. The pre-production sample should represent what the factory will actually make, using the agreed materials, hardware, artwork and construction. A simple logo order may combine several of these steps. A new carry system or closure may need an extra round to check the change under load.
Start the review with the objects the product was designed around. Put the specified phone in its case, add keys and a wallet, close the bag and wear it in the main carry position. Check whether the weight causes the pouch to roll, pull the strap toward the neck or distort the zipper. Open it while standing and seated. Repeat the review with the shortest and longest practical strap settings and any secondary carry position promised in the product listing.
Write feedback against the actual sample revision. “Make the front pocket bigger” leaves the pattern maker guessing which dimension matters. “Increase the clear opening so the cased phone shown in the brief can be inserted while the bag is worn” describes the task the design has to perform. Add the expected opening dimension if that is part of the specification. When revising the pocket, check adjacent seams, logo position and usable main-compartment volume at the same time.
Keep an approval record that names the approved sample, fabric article codes, hardware references, decoration files and packaging revision. Record any deviation expressly accepted for production and update the drawing if the approval changed it. Send the final revision with the purchase order. A photo can document logo placement or an external detail, while an approved physical sample helps with judging hand, fit and colour. Give the factory and inspection team access to the same reference.
Put quality checks where corrections are still possible
Incoming materials and first units
Check incoming materials against the approved references before cutting. Inspect the fabric face, colour and backing, and confirm that webbing matches the buckle and adjuster specified for the order. Compare hardware colour across the matching pieces. A slight shade difference on two separate parts may become obvious once they are assembled next to each other. Check the actual print or label applied to the production fabric, particularly when the order includes several shell colours.
Review the first sewn units before the entire run follows the same setup. Check strap direction, buckle position, zipper clearance, front-panel symmetry and label orientation. Pay special attention to changes made during sampling. If the pattern was revised to keep the bag from tipping forward, load and wear a first unit before approving the line to continue. If the strap keeper was moved, test it at both extremes of adjustment.
Functional checks and defect definitions
Match the inspection to the job the product has to do. Use the intended contents when checking opening clearance and zipper operation. Load the strap at the agreed condition and inspect the webbing, adjuster and stitched anchors. For a movement-oriented style, use a defined movement trial with a way to measure strap slip. For a moisture claim, record the exposure, duration, orientation and the locations checked for entry. Agree in advance on what is acceptable and whether a check is destructive.
| Inspection area | Example of what to verify |
|---|---|
| Dimensions and fit | Measure the shell and closed strap loop as shown in the approved tech pack |
| Zipper and buckle | Operate the zipper under the intended fill and check that the buckle engages and releases as specified |
| Strap security | Confirm that the strap routing is correct, the adjuster holds and the anchors show no unacceptable change after the agreed check |
| Artwork and colour | Compare size, placement, colour and appearance with the signed sample or approved artwork |
| Packaging and quantity | Scan labels where required and reconcile unit, carton and purchase-order counts |
| Moisture performance when specified | Verify the assembled bag or compartment using the exposure agreed for the claim |
Write examples of defect categories into the inspection sheet. A buckle that will not stay latched, a pocket the specified item cannot enter and a barcode linked to the wrong SKU are distinct failures with different consequences. A cosmetic mark on a hidden lining may be treated differently under the buyer’s criteria. Give the inspection team photos or samples for borderline issues when possible.
If you use an acceptance sampling plan, agree on the standard and edition, inspection level, lot definition, defect classes and acceptance rules before the shipment is ready. ISO 2859-1 describes lot-by-lot sampling schemes indexed by acceptance quality limit, or AQL. The plan supports a lot acceptance decision based on the units sampled. Set separate verification for features that require a dedicated functional check or stricter handling. If the lot fails, record the hold, corrective action and reinspection decision before release. ISO 2859-1
Plan the order back from the required arrival date
A factory lead time often starts after a defined milestone, such as the approval of production materials or receipt of a deposit. Ask what triggers the quoted timeline and what has to be ready at that point. Plan backward from the date the goods must arrive. Include delivery to the named site, freight and customs handling where relevant, time to correct an inspection finding, assembly and packing, component procurement and all buyer approvals. Give each approval an owner and a due date.
Keep the schedule by dependency. Shell fabric and webbing may be readily available while a custom-colour buckle is waiting on a colour approval. Printing may be booked but cannot begin until the artwork and substrate are signed off. If the required arrival date is fixed, ask the supplier to quote the schedule for both stock and custom components early. That gives the buyer a decision while the design is still flexible.
For an event order, agree on when you would switch to an approved stock colour, expedite part of the shipment or release a smaller first delivery. Price those options if they are genuinely usable for the programme. For a retail launch, check how split shipments would affect SKU availability, distribution and the launch assortment. The best decision depends on which units have to be available together and which can arrive later.
Before dispatch, reconcile the packing list with the order quantities by colour and SKU. Check carton marks against the receiving instructions and review any documents your logistics team needs for the route. Assign release responsibility in writing. The same person or team should know the inspection outcome, what was corrected and which cartons are cleared to move.
Make the first order easy to repeat
After the first delivery, collect returns and customer comments by issue. A zipper that binds around one curve, a strap tail that customers cannot secure and a pocket that is too shallow are separate observations. Match the feedback to the product revision, colour and production lot when possible. That helps you decide whether a problem comes from the design, a particular component or variation in assembly.
Ask the factory which materials and trims can be reordered by the same article code and which were bought specifically for the first run. Keep approved artwork and print references available. If a mill or hardware supplier proposes a replacement, review the change against the function of that part. A nominally identical webbing width can still behave differently through the adjuster. A new zipper tape can affect appearance and turning radius. Recheck the affected function before the substitution enters production.
Update the tech pack after a correction and carry the new revision onto the reorder. The approved sample, bill of materials and inspection sheet should all point to the same version. This is especially useful when the second order adds a new colour or moves to a different size. A repeat order can move quickly when everyone knows which decisions have already been made and which new conditions need a sample.
Questions B2B buyers ask about custom belt bags
Can I order several colours under one minimum?
Sometimes. Confirm the minimum per style, per colour and for each custom component. Ask for a quotation against your proposed split. A stock-colour shell may support a smaller split than a custom-dyed fabric, and a special trim can impose a separate minimum even when the shell is readily available.
What should I send before asking for a price?
Send the intended use, carry position, size or reference dimensions, quantity by colour, logo requirements, target price and required arrival date. Include a sketch or tech pack if available. If material choices are open, describe the desired feel, appearance and performance and ask the supplier to quote a defined construction for each option.
How do I approve a bag for both waist and crossbody wear?
Specify the required fit range and confirm it on a loaded sample in both positions. Check the adjustment range, angle of the pouch, buckle location, access to the zipper and any rubbing from the webbing. Use representative wearers and clothing for the target market. Record the approved strap setup on the drawing so it can be reproduced.
What changes usually call for another sample?
Changes to the pattern, strap geometry, buckle or adjuster pairing, shell weight, zipper construction or wet-use design can affect fit and function. Review a revised sample or the affected assembly before production. A new logo or colour may only need an artwork or material approval when the underlying construction stays the same and the change has no effect on function.
Can a coated fabric make a belt bag waterproof?
A coating can improve the fabric’s resistance to water penetration. The completed bag’s performance also depends on its seam and closure design. State the exact exposure the product is intended to handle and base any claim on testing the completed bag under those conditions.
Brief Raketbag on your custom belt bag project
Raketbag offers OEM and ODM sports bag development, including material selection, branding and production support. For a belt bag enquiry, send your use case, the largest item the bag needs to hold, preferred carry positions, quantity by colour and required arrival date. Share the artwork and any packaging or inspection requirements you already have. If the design is open, identify the points you want the manufacturer to help resolve, such as strap fit, the shape of the opening or the level of moisture protection.
Ask for a quote tied to a specific construction and a sample plan tied to the decisions you need to make. Once you approve the fit, the materials and the brand details, use the same specification for the purchase order, the production sample and the shipment inspection.